CDL Switch Install on FZJ80 - 80 Series
Author: Thomas Wong May 27, 2012
Hey, guys - since the weather was unseasonably cool yesterday and today, I took a break from digging in the mud to fix irrigation leaks around the house to install the Center Diff Lock switch into the dashboard allowing selection of locked center transfer case even when in High gears. Here's the write-up;
Difficulty = 1, if you can wield a screwdriver without injuring yourself, you can tackle this project. Cuss Factor = 0, as long as you have the parts ahead of time, this is plug-and-play. Time = 30min to an hour, being careful.
Start by checking out the Slee instructions here - Christo even sells the correct TLC Factory switches for this job, but the price is up there: http://www.sleeoffroad.com/installat...ck_install.pdf
You'll need the following parts;
1) Phillips head screwdriver - to remove 4 self-tapping screws which hold the bezel in place.
2) CDL switch - or any standard TLC switch, from what I'm told, though there's a minor modification if you choose to use a Hazard Switch like I did
3) Some patience.
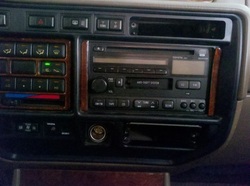
As the Slee instructions note, start by removing the factory cupholder if yours is so equipped. This is accomplished by extending the cup holder, and then taking out the 2 screws on either side. This frees up the top of the bezel. From there, remove the ashtray, and within that space are 2 more screws just like the other two, so don't worry about getting them mixed up on reassembly. Set these aside. Here's the quick view;
You'll notice that I also put the keys in the ignition and pulled the gear selector all the way back to afford me more space to work with (*and to get clearer pictures for 'yall).
Grab the bezel on the right side from one of the holes, and pull GENTLY to free up the center friction locks. There's a set of friction locks on the Left Side that you can see at the top of this picture;
Grab the bezel on the right side from one of the holes, and pull GENTLY to free up the center friction locks. There's a set of friction locks on the Left Side that you can see at the top of this picture;
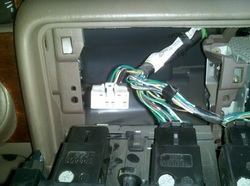
At this point, pop out the switch cover (mine was for the Toyotal Security lights which I relocated to the bottom of this panel - yours may or may not have that one, and if it does, there's plenty of wire left to move it wherever you want). Now that you have a free slot for your High CDL to be mounted in, slide the switch into place from the front. You'll be able to see the harness tucked back behind there, and pull it forward so you can get to the white connector shown above. That harness plug will have a shunt plug which is white, with a single jumper of yellow with a silver trace. Remove the shunt plug, and set it aside.
Since I was using a TLC Hazard Switch, the connector from the harness needs to be cut slightly right next to the retention tab - I'm guessing Toyota designed it this way to prevent the wrong harness from being attached to the wrong switch at the factory - given that the switches and plugs are NEARLY interchangeable. It'll be obvious where it needs to be cut to allow the plug to fit into the switch. Plug it in, and it will snap into place with a click.
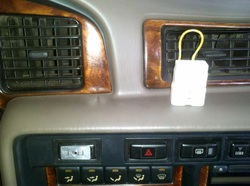
Reinstall the bezel taking care to tuck the wires in carefully so they don't hit on anything, and use care when pushing back in against the friction locks. Here, you can see the High CDL switch installed, along with a red cover for the indicator light, and I've also glued the custom aluminum CDL Switch Cover Plate custom made by one of our local forum members. Install the 2 screws, put the ashtray back in, and slide the cupholder back in, along with it's 2 screws, and you're done.
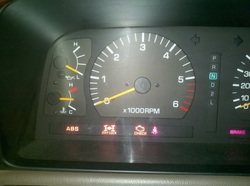
Once finished, you'll be able to click the High CDL switch and get this;
I tested it out repeatedly, and you can hear the CDL in the transfer case motoring back and forth, along with the indicator on the dash showing what position it's in. I tested it without the engine running, and will have to get out off pavement to test it out fully.
Now that I have the option for CDL in High gears - what are the conditions that I'd be using it?
Honest question for those of you still reading. I'm thinking it's best for anywhere that I'd want the extra traction of even split F/R but also want to use higher vehicle speeds; shuffleboard roads, maybe??? I'm curious what others would use High CDL for, but glad I have the option now. I would also think that this allows you to engage the Rear or both Rear and Front lockers if so equipped, while in High gear. Not sure why I'd do that, either, but the capability is there...
Thanks again, Saddletramp, for providing the parts for this quick and easy install - I don't know why I put it off for so long!


