Rear Storage Area - 80 Series
Author: Eirc Murphy Sep 5, 2012
I needed more space in the back of my Cruiser! With my sub box and my big bag of gear (jack, tools, etc) I always carry around taking up about 2/3rds of the rear cargo space, I was Home Depot challenged.
I first thought about gaining some space with this thread > http://forum.ih8mud.com/az-copper-st...k-inquiry.html. jjgarci1 emailed me and said he would help me come up with something utilzing his welding skills gained in the military and the use of his garage/shop (evidently sponsored by Mountain Dew from what I can tell by the empties).
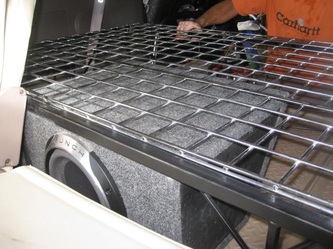
A couple nights later I went to the monthly CSC meet and we checked out several nice set ups. Further discussion led us to realize a rear grid shelf set up would better address what I was looking for. It would just clear the sub box and have a grid top where items could be bungied down. Off he went and I knew whatever he came up with would rock - I was still pleasantly suprised with the final set up.
He fortunately found some used grid on CL just a couple miles from his house (dig the chrome baby!) and started building using his own 80 for the template.
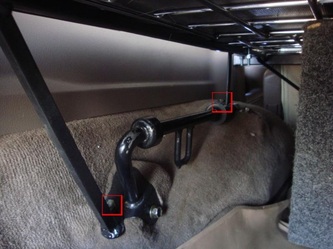
_The clearance is tight utilizing all the room but still not rubbing on anything. The whole unit is very square with gusseting on each corner designed for maximum clearance where it is needed. There are four legs that come off the side of the frame and use existing bolt holes from the 3rd row seat brackets for extra stability (marked in the picture).
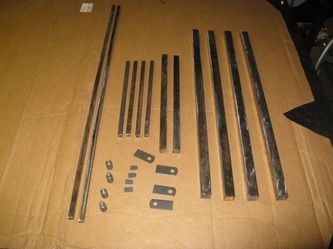
In order to make the frame large enough to maximize use of the space underneath, John made the frame expandable for ease of in and out. Small u bolts hold the grid down tight to the frame and is completely quiet - no noises. I topped it off with a thin padded top that can be easily removed when the bungies come out.
In order to make the frame large enough to maximize use of the space underneath, John made the frame expandable for ease of in and out. Small u bolts hold the grid down tight to the frame and is completely quiet - no noises. I topped it off with a thin padded top that can be easily removed when the bungies come out.
_Medtro joined us for the final install at Johns house and helped us bolt her in. I also noticed that when the seat backs are folded forward, the level of the seat backs are the same as the shelf for one continuous flat space. Home depot runs will be much easier among other things.
A huge thanks to John (jjgarci1) for offering to help and going above and beyond for no reason other than the desire to help a cruiser brother out. The mans got skills, that for sure.
A huge thanks to John (jjgarci1) for offering to help and going above and beyond for no reason other than the desire to help a cruiser brother out. The mans got skills, that for sure.


